This fun little Halloween card, or should I say Howl-o-ween card, is the first in a series of cards that I’m making to donate to Cards for Hospitalized Kids.
I’ve had this stamp set for a couple years and am excited that I finally have an outlet to send children’s cards to. For the background, I started by blending together Distress Oxide inks in Seedless Preserves and Chipped Sapphire, then covering them with some Black Soot.
Card-Making Hack #1
When making the backgrounds, at first they weren’t going to be used behind acetate in a shaker card. I didn’t want to risk the background getting messed up, so I turned to an old standby product for protection. After blending everything together, I used some Judikins Microglaze to protect the Distress finish. I’ve never seen anyone use it on Oxide inks, even though they are at higher risk than regular Distress inks for changing appearance if they accidentally get wet. It’s a substance similar to petroleum jelly and is applied very sparingly, then buffed off. Magic!
Game Changing New Tool
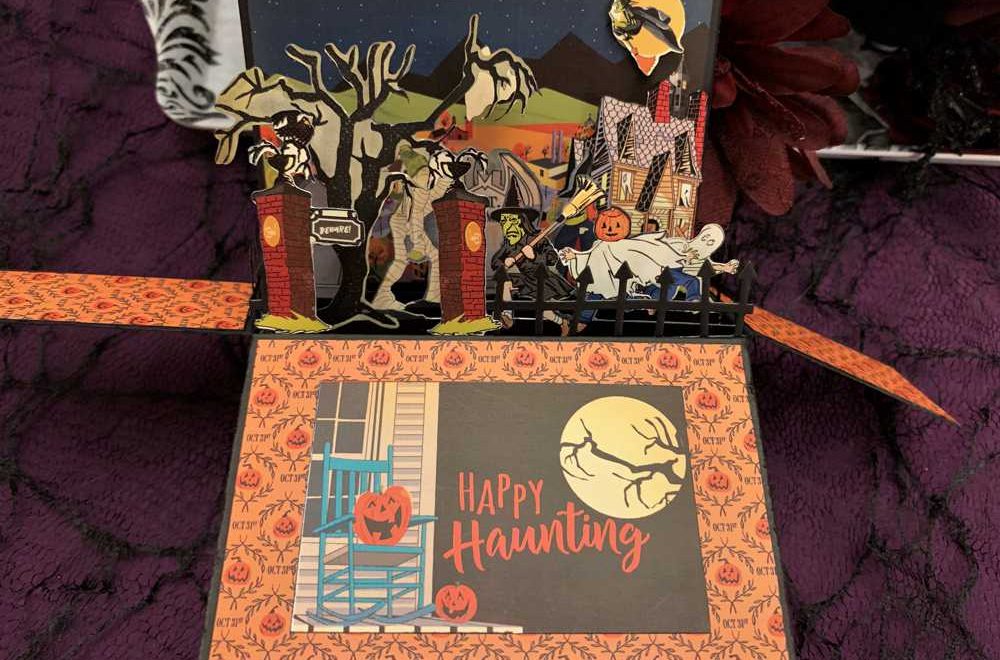
Instead of using dies to cut out all of the stamped images, I turned to my favorite new toy, my Brother Scan n Cut. I have used a Silhouette Cameo since the beginning, but have been frustrated with how it cut designs out as well as how tedious it was to cut stamped images. I splurged on a second machine and was enticed by the Scan n Cut. It’s so dang easy!! Just place it on the mat, press a few buttons, and voila! It’s scanned the image in. A couple more button presses and boom! All your shapes are cut out. Accurately too. I cut all of the images out with zero border around them. For such a dark and moody scene, I didn’t want white borders distracting from the night sky.
A little die-cutting with Lawn Fawn’s Tree border (this one in vertical) to create the front of the scene. I used some black Michael’s paper as well as some dark grey for the grass (Lawn Fawn’s Grassy border) and for the body of the tree.
With all my parts gathered, it was time for assembly. I used glue to hold everything down. No extra dimension with foam tape on this scene–I didn’t want the sequins to fall behind anything. And that’s when I devised…
Crafty Hack #2
I needed acetate for the window part of the shaker, which takes up most of the front of the card. I realized that laminating pouches run through the laminator empty would make affordable full-sheet acetate sheets. Given I was making multiples of all of the cards, for the hospitalized kids, I would need quite a few sheets of acetate. Since that’s a special order, kinda spendy product, I thought the laminator sheets would be perfect.
I also used an awesome product sandwiched between the acetate and the card base. Instead of cutting up doubled-up pieces of foam tape–which never cut right anyway–I used Stampin Up’s foam strips for shaker cards. They make things easy-peasy. With all the pieces ready glued and foamed, it was time to add some sequins and seal it all up.
Walk-through Video
Here’s a link to our video where I share all of the products used as well as some assembly tips.

Love this cute Howl-o-ween card? Want more Halloween cards? Check out our prior Halloween series here.